Hatching Time Cabinet Incubator Review: Real Results from My Quail Hatchery
When I decided to scale up my quail breeding operation, I knew I needed an incubator that could handle large, consistent batches without constant babysitting. After trying several brands over the years, I landed on the Hatching Time Cabinet Incubator (specifically the CT120-SH model) and it’s made my hatching life a whole lot easier.
Whether you’re brand new to quail or finally ready to scale up, I want to give you a real look at what it’s like to run one of these cabinet incubators every day… what works, what doesn’t, and what I wish I’d known before ordering mine.
Quick note before we get started: I’m part of Hatching Time’s affiliate program, so I may earn a small commission if you decide to order through my links. I was already a loyal Hatching Time customer long before that. I only recommend their gear because it’s what I actually use (and trust) in my own breeding setup.
Why I Chose the Hatching Time Cabinet Incubator
I’ve been hatching Coturnix quail for over a decade, and the jump from tabletop incubators to cabinet models was long overdue. The small units worked fine for hobby hatching, but once I was juggling several color lines and hatch dates, things got out of hand fast.
The Hatching Time Cabinet Incubator offered the space, reliability, and automation I needed to keep up with production. The CT120-SH gives me four trays and four baskets, enough to incubate more than 300 quail eggs at once. Each tray turns automatically, and the baskets make sorting by color line simple. It’s meant for people who are hatching often, but it’s still easy enough that a first-timer could figure it out without too much frustration.
If you’re still comparing incubator styles, my guide on how to choose and set up the best incubator for quail eggs walks through the pros, cons, and setup differences between cabinet and tabletop models.
What You Get with Each Model
All three models are built the same way. The only difference is how many trays and baskets they hold. The internal design and controls are identical.
| Model | Trays & Baskets | Quail Egg Capacity |
|---|---|---|
| CT60-SH | 2 | 108-156 eggs |
| CT120-SH | 4 | 216-312 eggs |
| CT180-SH | 6 | 324-468 eggs |
Each unit comes with:
- Digital temperature and humidity controls for precise regulation
- Automatic turning trays that rotate eggs on schedule
- Removable hatching baskets for organized batch management
- Smooth, easy-to-clean interior surfaces to minimize bacteria buildup
All models run quietly, hold temperature evenly, and recover humidity quickly after opening (something most tabletop incubators struggle with).

What It’s Like to Use Every Day
I currently run two cabinet incubators (one as a setter, one as a dedicated hatcher), but before expanding, I used a single CT120 for both. Here’s what I’ve noticed after running more batches than I can count.
Consistent Hatch Rates: Temperature and humidity hold steady from day one through lockdown. My hatch rates average above 90%. Celadon eggs can be finicky with their thinner shells, but steady humidity has kept my hatch rates strong with them too. The calibration has been spot-on out of the box, and I haven’t needed to make manual adjustments.
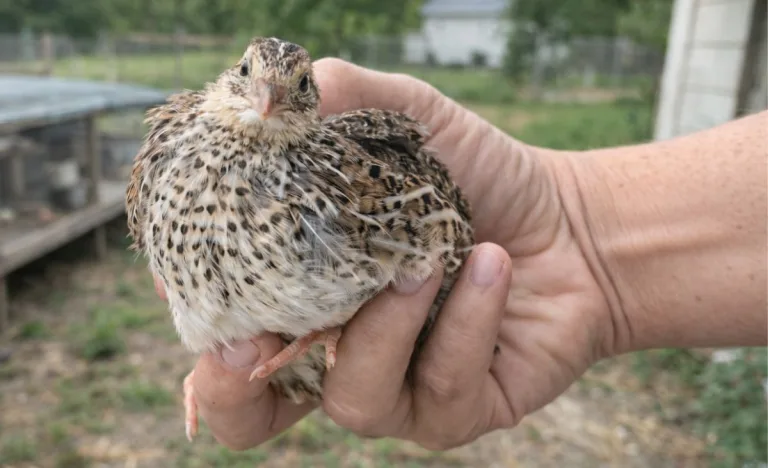
Spacious and Organized: Each basket holds roughly 50–70 quail eggs, depending on size. I use colored poultry leg bands on chicks as I move them from the hatching baskets into brooders, which makes tracking each color line simple without running multiple hatchers.
Reliable Automation: The automatic turning system eliminates the biggest manual step in incubation. It runs quietly and flips eggs gently enough that even smaller quail eggs remain stable. The screen shows both your target and current readings, so you can tell right away if something’s wrong. There’s also an alarm loud enough to hear from the other side of the house.
Easy Cleaning Between Hatches: This incubator is smooth plastic throughout, no seams or exposed foam to trap debris. It wipes down quickly and dries fast, which keeps bacteria under control and prevents contamination between hatches.
Using One Incubator for Both Setting and Hatching
If you’re starting with a single incubator, this is how to manage both stages in one unit:
- Days 1–14: Keep eggs in the turning trays at 99.5°F with humidity around 45%.
- Days 15–17: Stop turning and move eggs to the hatching baskets. Raise humidity to 65–70%.
- Day 18+: Most quail hatch around day 17–18. Leave the incubator closed as much as possible to maintain humidity.
If you want the nitty-gritty details on humidity tweaks or what to do when things go sideways during lockdown, I’ve got another post that walks you through it step by step. It breaks down the fine-tuning that can make or break your hatch rate. For a closer look at incubation timing, humidity adjustments, and troubleshooting common issues during lockdown, check out my complete guide to hatching Coturnix quail eggs from start to finish.
Once hatch day ends, unplug, clean thoroughly, and reset for your next batch. That setup lets me roll right into the next batch without much downtime.
What I’ve Learned After Long-Term Use
Here’s what you can expect after the honeymoon phase—once you’ve really put it to work.
What I Love About the Hatching Time Cabinet Incubator
Let’s start with the good, because there’s a lot of it. These are the things that have made me stick with Hatching Time even after trying other brands.
- Excellent hatch rates (90%+ when eggs are fertile)
- Precise temperature and humidity control
- Ample capacity for large batches of quail or mixed poultry
- Removable baskets simplify color line management
- Low maintenance and quick cleaning
Things That Could Be Better
No incubator is flawless, and this one has a few quirks you’ll want to be aware of. They’re minor things, but good to know.
- Pricey upfront investment, though worth it if you hatch regularly
- Takes up more space than tabletop models (needs 1 ft clearance on all sides)
- It runs best between 68–77°F, so I can’t keep mine out in the hatchery once Maine’s summer heat or winter cold hits
- Slight learning curve dialing in humidity for your environment
Earlier versions had baskets that didn’t seat snugly on the rails, but newer models (post-2024) now include improved basket bases. If you’ve got one of those older versions, these stabilizing ‘feet’ help a lot.
When Things Don’t Go as Planned
Even with a dependable incubator, little hiccups happen. These are the fixes that have worked for me.
My humidity won’t stay stable: Check that water reservoirs are filled correctly and that vents aren’t blocked. In very dry climates, you may need to add a damp sponge or small container of water.
My hatch rate dropped suddenly: Verify thermometer accuracy with a separate digital thermometer or hygrometer. Power fluctuations or temperature drift in your room can affect results.
Should I recalibrate the incubator? Only if you see consistent temperature discrepancies. Hatching Time units typically hold calibration well; mine hasn’t needed adjustment after dozens of runs.
How It Stacks Up Against the GQF Sportsman
| Feature | Hatching Time CT Series | GQF Sportsman |
|---|---|---|
| Capacity | 100-450 eggs | 250-350 eggs |
| Automatic Turning | Yes | Yes |
| Humidity Display | Digital | Analog |
| Cleaning | Smooth plastic | Metal & wood interior |
| Best For | Quail and small poultry breeders | Large mixed flocks |
If you’re hatching primarily quail, Hatching Time wins for ease of cleaning, modular trays, and humidity control. The Sportsman is a solid machine, but for most of us hatching at home, it’s more incubator (and cleanup) than we need. If you’re just hatching for yourself or testing a new line, a small tabletop model might be plenty.
Frequently Asked Questions
Before you dive in, let’s clear up some of the common questions I get about these incubators so you can hatch with confidence right from day one.
The CT60 holds about 108–156, the CT120 holds 216–312, and the CT180 handles 324–468 quail eggs.
Yes, it works for most poultry species. These models come with quail-sized rails by default, but Hatching Time sells optional rail sets for chickens, ducks, and geese if you plan to hatch other species.
Not necessarily. You can use one incubator for both stages as long as you plan your batches carefully and clean thoroughly between hatches.
Run the incubator for 4–6 hours before loading eggs to let temperature and humidity stabilize.
Hatching Time offers solid customer service and replacement parts. I’ve had quick responses when ordering extras like trays or water reservoirs.

After years of hatching quail, the Hatching Time Cabinet Incubator is the most reliable setup I’ve ever worked with. The digital controls, easy cleanup, and consistent performance take the guesswork out of incubation. If you’re serious about breeding or scaling up, this incubator is worth every penny. It saves time, keeps hatch rates steady, and helps me stay organized across all my color lines.
Keep it clean, keep an eye on humidity, and it’ll treat you well every single hatch. You’ve got this.
If you’re ready to order your own incubator, Hatching Time gave me a special code to share with readers. Use FORGETMENOT at checkout for $25 off any order of $250 or more. It’s a little extra savings if you’re ready to invest in something that’ll last for years.